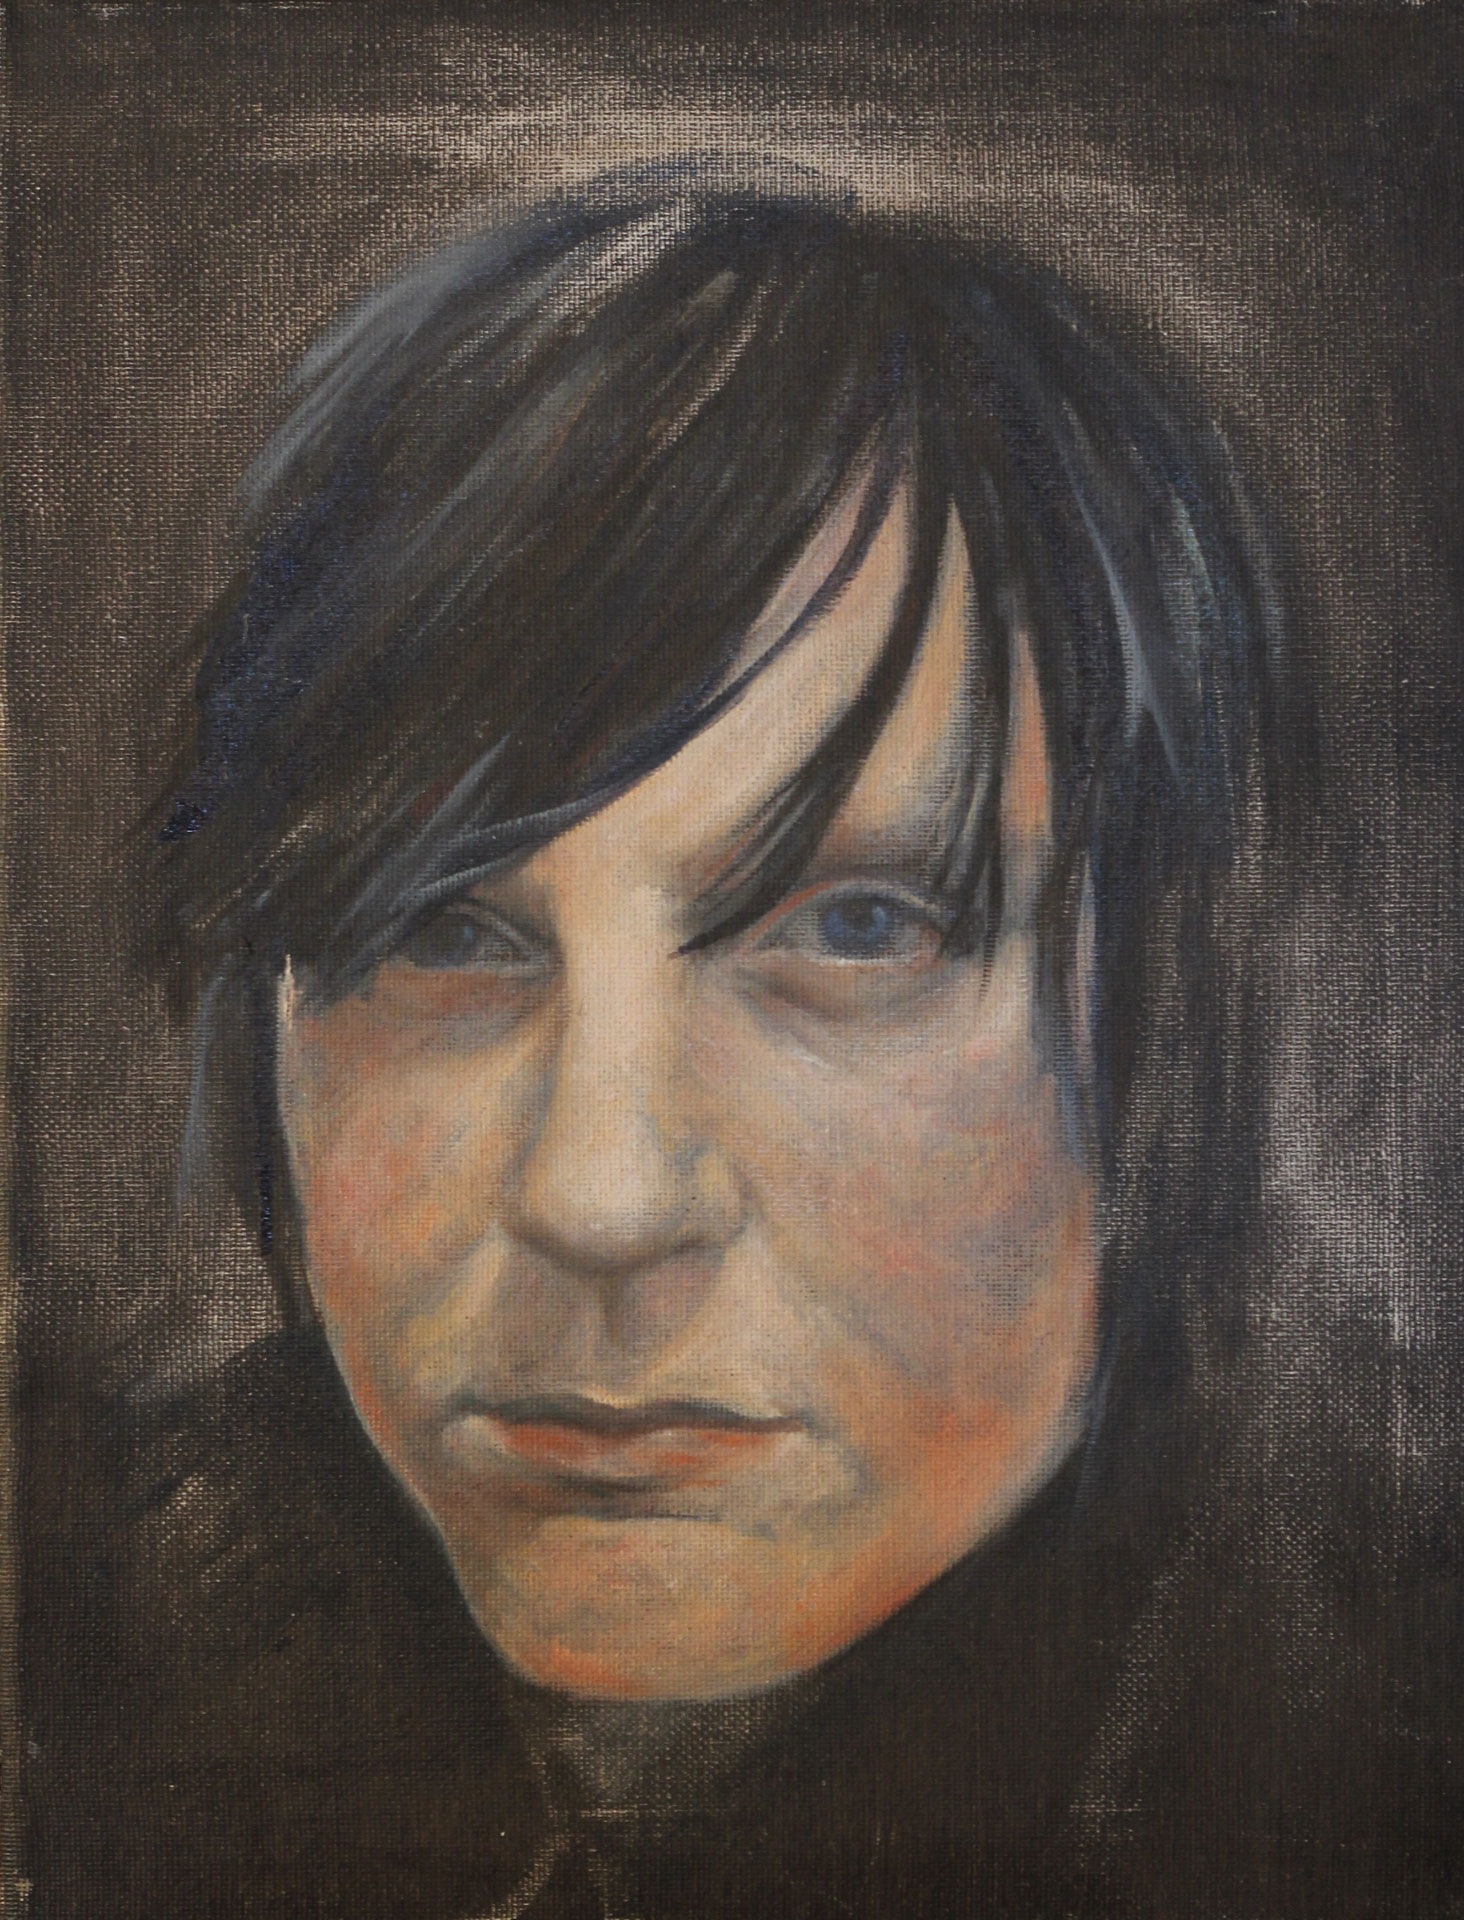
Just a few pictures I took as I painted an oil on canvas portrait. The young man in the photograph’s name is Jack.
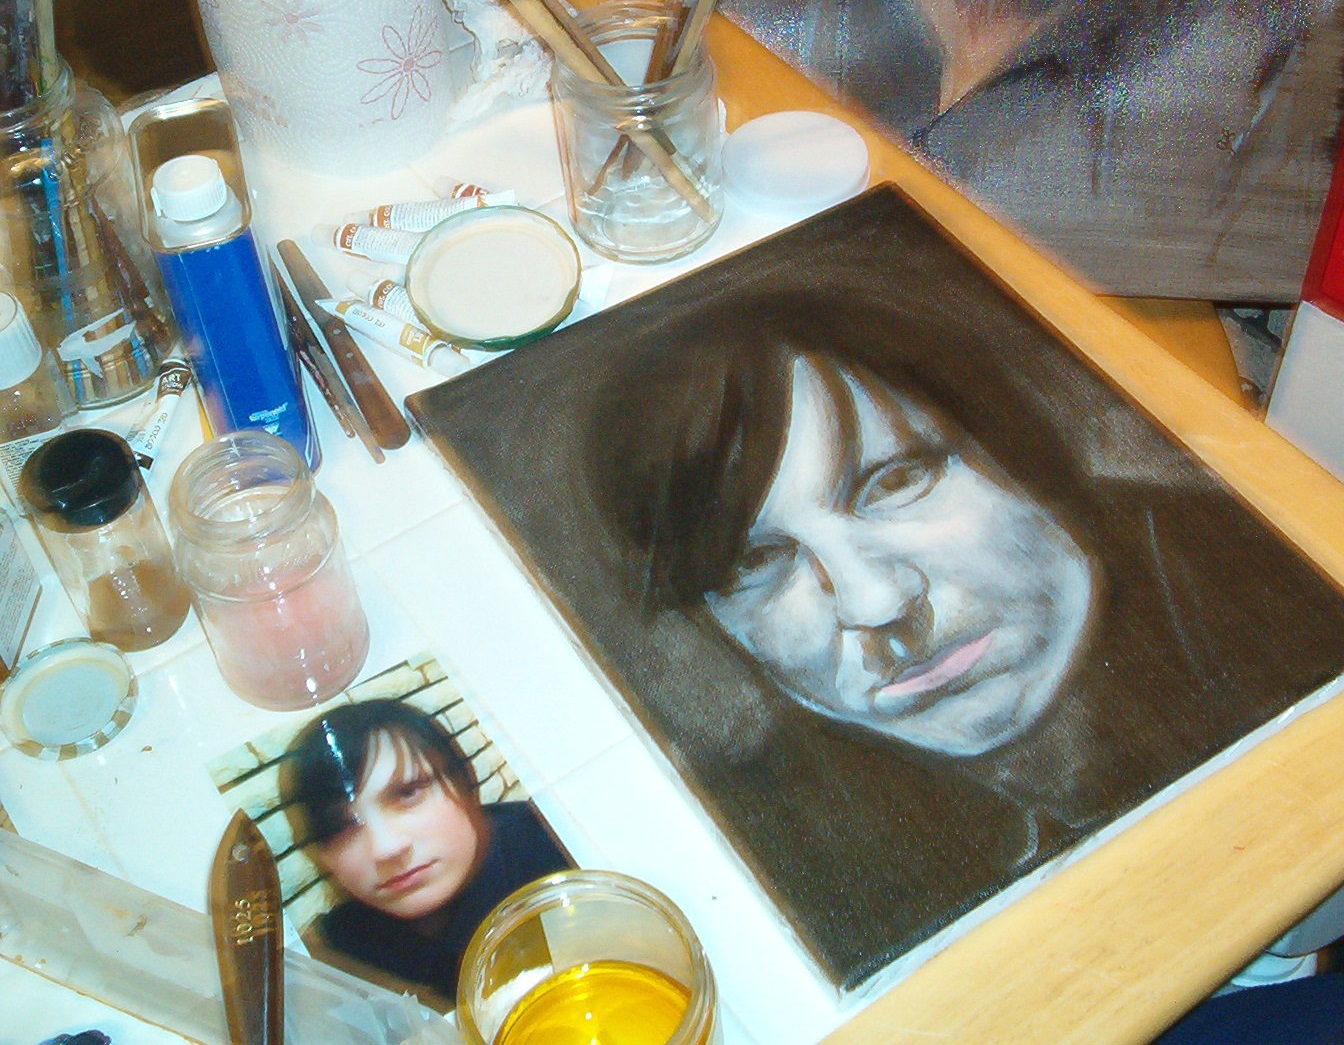
I started by mixing gesso and black acrylic paint, then applying it onto the canvas as a base. I then used linseed oil to subtract from the acrylic and begin the drawing. As I did this, I paid attention to where I wanted highlights, midtones and shadows to be. Wherever there was highlights, I used the most linseed oil to really pick up the black, then used the oil less and less according to how much or little shadow was there. I only utilized this method on the face though, as I knew I wanted parts of the painting to be loose and unfinished feeling, while letting other areas be fully rendered. For the shoulders and the hair, I just used a quick application of the linseed oil to block out the shapes.
After that first level dried, the next step was to choose my palette in oils. Its important when painting from life to include all of the colors you see in front of you, no matter how slight you see them. A common mistake beginning painters make is to use too few colors, which gives a flat and unrealistic appearance (which is fine if that is your objective though). Train your eye to see all the variation of color in everyday life. For instance, human skin is never one color, or even two or three. If you look close, you will see shades of blue, pink, red, yellow, orange, even purple or green underneath or mixed in with what appears to be the main skin tone. Even a solid color changes to many different tones and hues where light and shadow interact with it, in some places resulting in completely different colors altogether. Adding even more variation to that is when the light and shadow get closer or become further away.
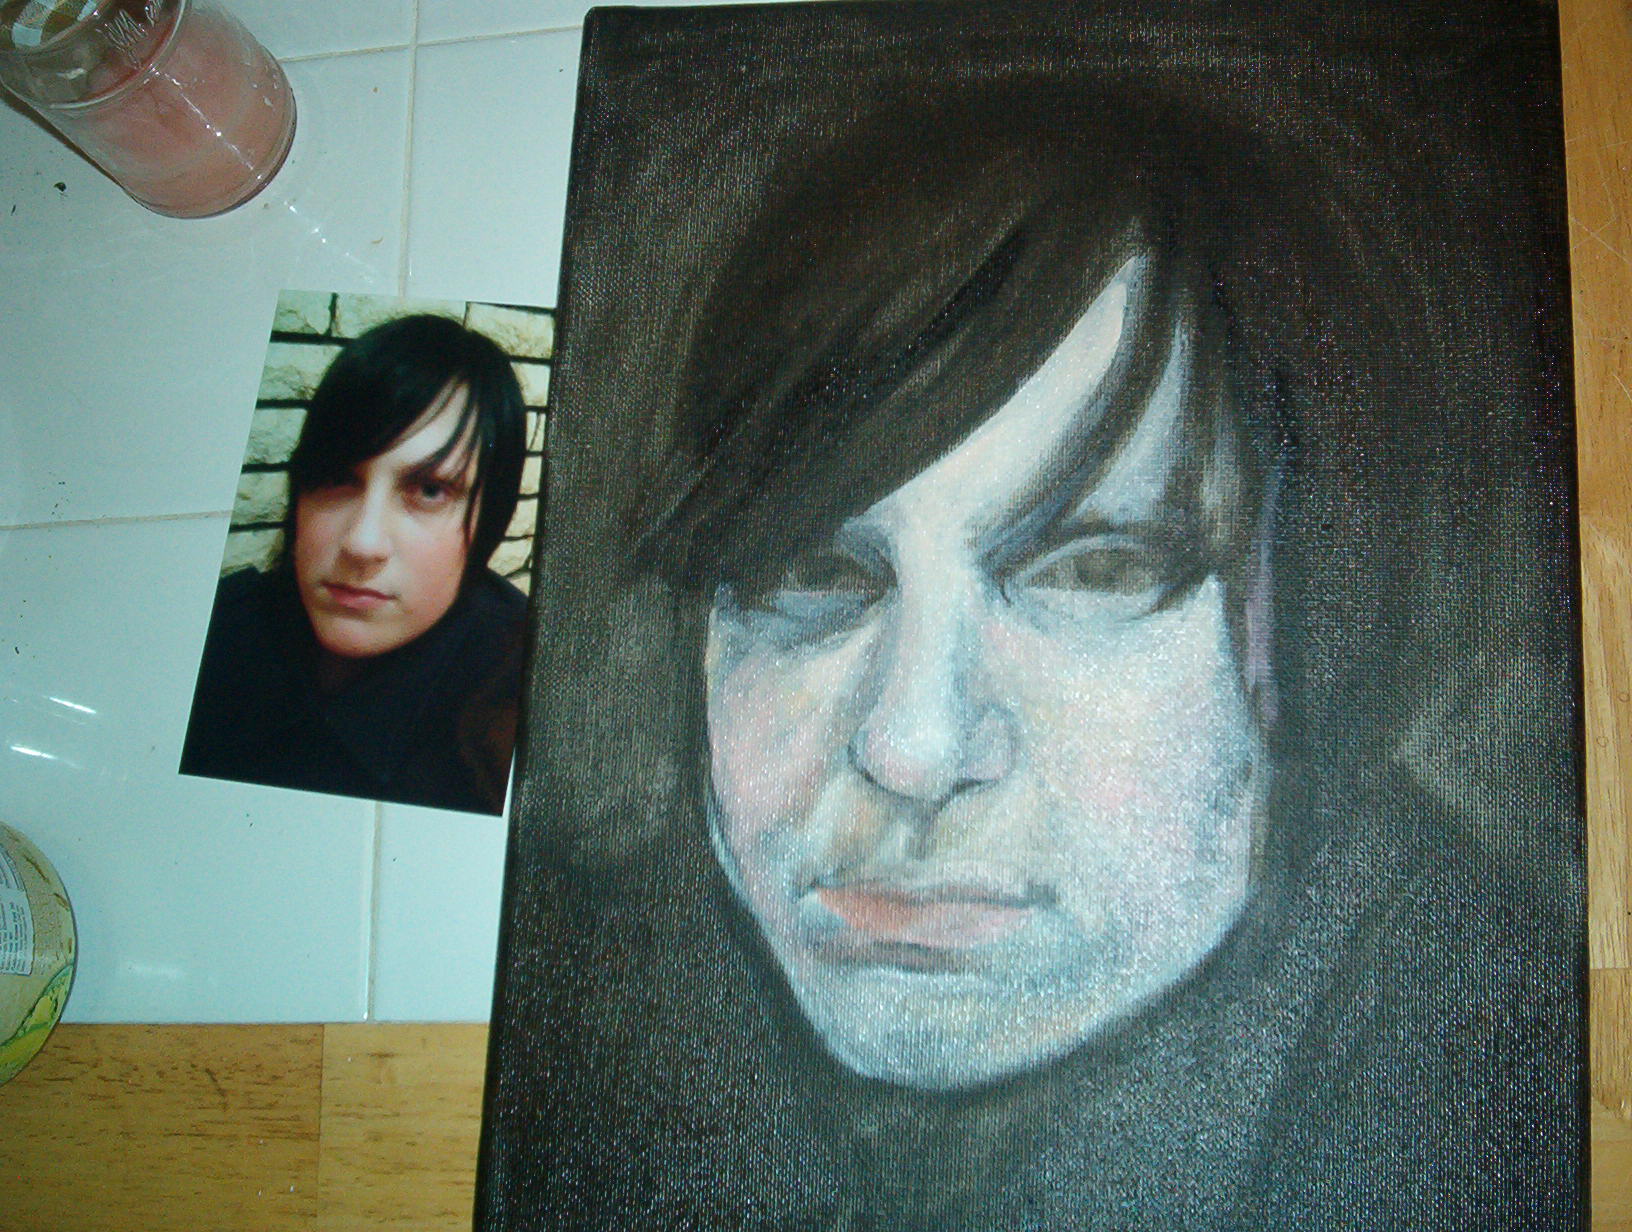
I then began to add in patches of color where I saw them as undertones in the photograph. After that, I began applying slightly heavier amounts of paint to subdue and more realistically form the shadows. In the picture below, you can see where I’ve done this around the eyes, bridge of the nose, lower cheeks and chin. The only place on the painting that still has the appearance of the initial linseed oil drawn shadows is under the nose ( I’d like to point out that, yes, I do wish that I would’ve photographed the first stage of this process as well, but I don’t always think of documenting as I work. Hopefully this is something I rectify as this blog continues). Before the addition of paint, all of the shadows on the face appeared like the one under the nose – much darker, blockier and unrealistic. Its an awkward stage to be in, staring at such an odd start, but it works out in the end, I promise.
Here is where I should talk a little about the application of paint and style. How much paint you put on your brush and apply to your canvas is up to you. This will obviously depend on what your end objective is, based on concept and how you want the piece to look. But also take into consideration how you enjoy painting, and what methods seem to be most successful for you. I’ve know people who seem to think there is only one way to properly paint: fat over lean, with a mid-level amount of paint applied. Sure, thats one way of going about it. But if you like to paint crazy thick impasto, paint crazy thick impasto. Me, I work in very thin layers. Its the method I find most enjoyable, and I really like the end result as well. It garners a more atmospheric quality, which is important to me. If you’re loading up your brush with a lot of paint, the method I’ve described so far is going to be more difficult. This isn’t the boldest approach. Subtly works best. Its not really about being timid though, its about taking time to allow discoveries to happen in the paint.
Next, I simply continued on with laying down patches of color, playing back and forth with following what I see in the picture and what looks good on the canvas. Don’t be afraid to deviate from your initial point of reference you start with, no matter what that is. Discovering new elements that are working well in the moment is part of the magic of the process, and becomes a part of how you creatively interpret your subject.
Once I got the face to a point where I felt it was on track with the skin tone and in general getting life-like, I started paying more attention to where I wanted the most emphasis to be. For this portrait, I knew capturing the right light and expression in the eyes would be key. That’s where I break out my smallest brushes and pay the most attention to detail. When I was felt the face was sufficiently done, I moved onto the outer area. As I said, I wanted the rest to have an unfinished and more raw appearance, so I went back in with turpentine to subtract areas, bringing out the texture of the canvas and creating areas of mark making. I also used turpentine to draw some of the lines around the shoulders and hair, and then applied some expressive color here and there, mostly blue and black. I feel the end result is successful. I like it.